

Today's tutorial time is my second rose tutorial, this one is slightly more detailed though, and a bit more Cath Kidston style.
I've used BarryM's 'blue moon' for the base colour. Put on a few coats and wait for it to completely dry. It's best if you can leave it over night because that way the roses will be a lot easier to do.
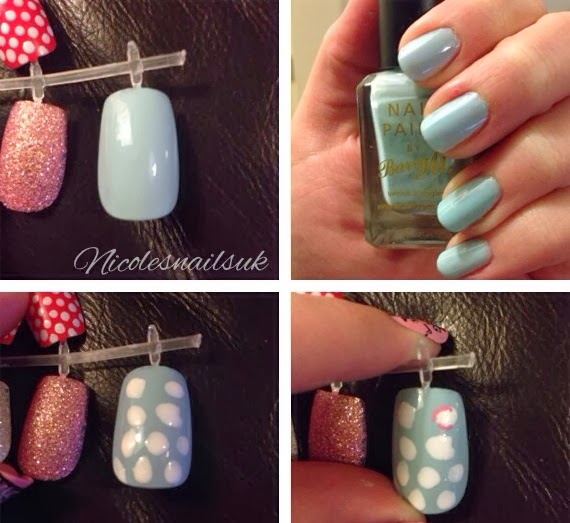
Add random white blobs wherever you want on the nail. Just use the end of the brush to do them, they don't have to be very neat, just nicely spaced out.
Once they are dry you'll ideally need a nail art pen to do this, I've used BarryM's pink art pen as the pink stands out nicely with the blue and white. Carefully draw round the white circle, leaving gaps here and there, making some lines longer than others and some just spots. Generally the only rule is to try and put a small line in the middle to create the centre of the rose.
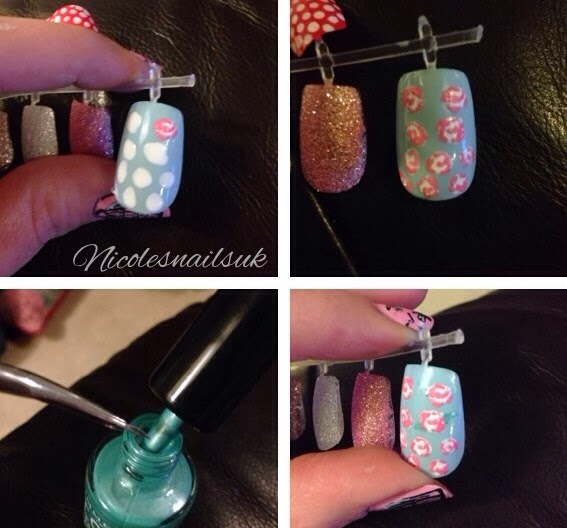
Once they are all done you just need to add the leaves. This is exactly the same as the last rose tutorial. Just use a darker green and accent it with a lighter one, in little green triangles. Randomly place them on the roses, you don't need two on each, just whatever you feel looks best. Use a thin, small nail brush to do this part.

I used BarryM's watermelon for the darker green and Rimmel's pear drop for the light green, but you can use whatever shades you want. And that's it! Just seal with your top coat and your good to go! This design looks great as just an accent nail or on each nail. You can play around with the colours as much as you like, I just like the blue as a background colour as it makes the roses pop without being too bold.

So I hope you've enjoyed this tutorial, if you have any questions please don't hesitate to ask :)
Nicole x
@nicolesnailsuk
Instagram:nicolesnailsuk
Pinterest.com/nicolesnails
No comments:
Post a Comment